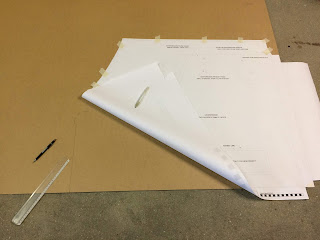
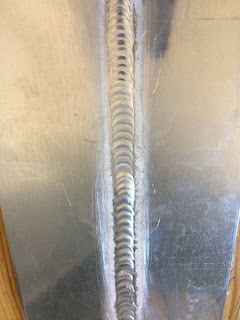
Transfering the drawings on aluminum sheet is a bit more difficult than on plywood. Of course I could have tried to mark the sheet with an awl but I choose a step in between and decided to make use of templates.
In fact it is quite straightforward: Instead of "scribing" the drawing onto plywood I scribe the drawing om 4mm MDF (the template). This can be more time consuming and costs a bit more. Except for that most of the templates only have to be "scribed" for one side (hull) or half (bulkheads). This reduces time and gives me the opportunity to eventually build next ship much faster.
Of course this all is a try out and it can end up in a one-time event. Considering the super nice model, the possibilities and the fact that Erik desperately would have a Pocketship as well, I have to take into account that I probably may build a second one (I'll get in touch with you for that John)!
Friday, 26 April 2019
Saturday, 13 April 2019
Adjusting the first drawings
Just started to cut out the sections of the drawings of the keel and center board.
The keel and center board trunk are the first to be build.
As I mentioned before the construction with aluminum will be different and often even simpler than in wood-epoxy. Take a corner joint between two sheets of 6mm wood for example. For some strength you need cleats, blocks, stringers, fillets, etc. In aluminum a single weld does the same trick without adding extra reinforcement.
Now the first adjustment is in the keel already. In the original design the nose of the keel consists of a solid wooden block which is necessary as this is one of the most vulnerable spots of the ship.
I could replace it with a solid block of aluminum but this will probably be overdone. Instead I will extend the keel side plates, bend the nose ends and weld the joint on both the in- and outside.
So I extended the pattern for the keel side plates in the drawings. Works fine as the drawings are very accurate and printed on quality paper.
Will be continued...
Wednesday, 10 April 2019
Lets learn welding (and start thinking of buying welding equipement)...
After 5 lessons TIG aluminum welding it is getting somewhere. And I really enjoy it.
I did so many courses in de the past. For radio licences, for pilot licences, first aid, and many more and that times 3 of course because every course has its varieties ;-)
And every course brings its own kind of learning experience too. Not by content in the first place but in learning psychology.
TIG welding is a skill with a lot of cognitive aspects. It needs concentration, know your machine settings, apply the "rules", train a steady hand and... mess up the whole piece of metal.
From the past 5 lessons I learned the most important things in the last 2: Know what you are doing but forget thinking about it and relax in the timeless moment of your welding process!
Ok, seems very "mindful" and I guess it is. But it works for me as well. Somehow I seem to be attracted to skills that needs a combination of concentration, skills and knowledge and welding is one of them.
And yes I have a challenge: I need to remember that I wanted to learn welding to be able to build my Alu Pocketship. And not to to explore welding as an art on its own. But I have to admit: It's tempting...
So just when a new addiction is luring, holidays are knocking at the front door and that means: no welding lessons for weeks and weeks: Time to find some proper welding equipement...
Welding equipement
We can't do without the Internet anymore. It's a shame maybe but I really have to admit. In the past we traveled 5 shops, survived 4 con tricks and felt (somehow) lucky to make a "good" deal.
Nowadays we can surf hundreds of websites, compare dozens of brands and make a selection from a few heavily reviewed shops. And this is what "pops up" quite frequently...
The EvoTIG 200 Pulse AC/DC TW 85. Nice names, lots of figures. In fact it says that it has a capacity of maximum 200 amperes welding, pulse welding and AC and DC welding. Especially AC is important for aluminum welding as DC is not applicable for this. Up until now it is only dreams as I did'n order the machine jet. And of course you already understand that only a machine (an inverter) is not enough to get welding. I also need an tungsten electrode, a welding helmet, gas, filler rod etc.
So let the build up the bill...
I also experienced that a pedal is absolute no luxury. Of course you can do without but to be able to start and finish your welds in a neat way, a pedal is important. Aluminum absorbs heat dramatically and you find yourself speeding up in the end drastically with all kinds of errors included! I never welded with a pedal but I guess that is one of the things I am missing.
Subscribe to:
Comments (Atom)


