Thursday 24 December 2020

Donald & Daisy

As you can see Donald & Daisy (the air scoops) arrived and were installed. 

Every step the boat becomes more of a beauty. And with every new piece of deck fitting the boat "doubles" in worth... Well not acurate of course but if all the expenses were expressed in weight, the boat would capsize 😊

Also fitted some other new deck rigging in order to be able to establish the forms of the anti slip mat wich I orderd in the mean time.

In the pictures below you see those fittings and also a first porthole pane installed...


Saturday 5 December 2020

Coating & rub rails

When it comes to coating things are slowing down. Building a boat from aluminum has a big advantage over building with wood: curing time is about 10 seconds 😁 instead of 48 hours (with our temperatures). This changes with the coating of the boat. 

I used a high quality 2 component coating which needs a primer for aluminum. Apart from the curing time I have to say that this is fabulous material. It sticks, it smooths and it is tough!

As I am not a fan of the high glossy coating (it seems so plastic-ish) I choose the satin gloss variety. And I think this is even more than glossy enough. 

I immediately saw that the paint job would require a difficult decission from me: Coating the boat revealed several imperfections. And after cleaning - grinding - filling - coating again it revealed smaller imperfections and so on. And yes on a certain moment I had to decide when enough is enough For a perfectionist that is a big task 😨. So I tried some scenario's which all were helpfull in their own way:

  1. Have a look at the boat from a bigger distance than 10 cm's
  2. Call a friend: "... it is important to see that it is hand made ..."
  3. Consult my wife: "Are professional built boats this perfect..." [?]

cockpit in the primer (hatches from China...)

 
Companion Way Hatch

And now for the rub rails. I had an idea for these right from the start. I saw a nice product that was made of PVC. It even came in a teak color that can be sanded to mimick wood veins. I only was not sure wether it would show to "gross". Well decide for yourself...


Here you can see the T-(mounting) rail (port, right side picture)


Trailer mod

Just an update with some progress.

First of all I modified my trailer. In the original configuration it has 3 keel rolls wich usually is perfect for most sports boats without a keel. For a boat with some keel like the Pocketship it works as well but with one nasty flaw: This trailer is tilting which is nice but the pocketship has a quite pronounced keel-front which hooks behind the second roll. It takes a lot of power to push up de boat and winching it in order to get the keel on the second roll. I actualy think it is allmost on the structural limits. 

CLC boats sells a trailer for the Pocketship that has skids instead of rolls which doesn't have tha problem. A disadvantage of the skid type trailer is however that you need to drive the trailer further down the ramp almost floating the boat off the trailer.


Skid type trailers doesn't seem to be available in the Netherlands so I decided to make the modifications myself. After all I can weld 😜. 

I made the skid from a hard wood terrace plank with 2 L-profiles on the sides welded together with 2 tubes. These tubes fitted the existing roller-struts. 


As you can see in the pictures I was able to fix the skid in the construction of the rolls. Now wait and see if i still can get the boat off the trailer 😳.


Saturday 7 November 2020

Couldn't resist it...

Yes, I had to buy a TIG-welding machine. Couldn't resist it.

Of course I am fully convinced that MIG is by far the most appropriate method for welding aluminum hulls cabins and the more heavy metal. Just the fact that it adds much less heat and so less deforming, the fact that you need only one hand that makes one free for holding pieces in place and that the torch can be put in all kinds of positions and small spaces makes this the number one for boat welding!

But TIG was my first love. It is so gentle, precise, clean and it doesn't smoke. There is no need for cleaning the welds and its very appropriate for (very) thin metal.

As I decided to make my own mooring clamps and mooring chocks and do some small finishing I missed my TIG-welder.  Compared to my MIG welder it is so small it could easily be installed on top of the MIG welder. I allready had an extra Gas-outlet so that was a quick fix.


small cleat for the centerboard pendant...


Saturday 3 October 2020

Welding comes to a finish

 Sow few and so many things to do...

Strange stage of building this is. I am not good at this. Most of the big jobs are done and now it comes to finishing things. All kinds of small things: sanding, priming, filling, sanding again, painting. 

And it all reachers a certain point of compromises: Certain points I cant prime and fill as I have to do some welding nearby (burning the epoxy) and when I do the welding the boat doesn't fit in the garage anymore which isn't very optimal for priming and filling in this season.

Maybe that explains the sad face...


I do however discovered so called "sports BT earplugs" which enlightens the job largely. It fits under my sound barriers and my welding mask in gives me a lot of joy.

But step by step I made some progress again. Did some finishing of the companionway and welded another chainplate. 


Saturday 8 August 2020

Companionway

A short post of my companionway. Short because the pictures are just a very brief representation of the whole “engineering-process” which took me several months. Making a slider in aluminum is a bit of a hustle for at least two reasons: First of all aluminum doesn’t have enough thickness to receive a milled notch and second because aluminum really “swings”: It warps in the most unpredictable ways when welded.

So it took me a while to think over the possibilities and at least a same while to fit and tack it together step by step.
And of course a bit bending and grinding to fit the nylon sliders nicely in the aluminum profile.

For the open end of the hatch-garage I applied a homemade forming profile. this worked very well and looks nice as well.


The garage is not finished yet but to get an idea how it looks in aluminum here are some pictures.


Thursday 9 July 2020

Trailer and centerboard

Two posts at the same date? Wow. No I am not the writer I expected to be so publishing posts is a bit infrequent sorry (but hey time doesn't exist...).

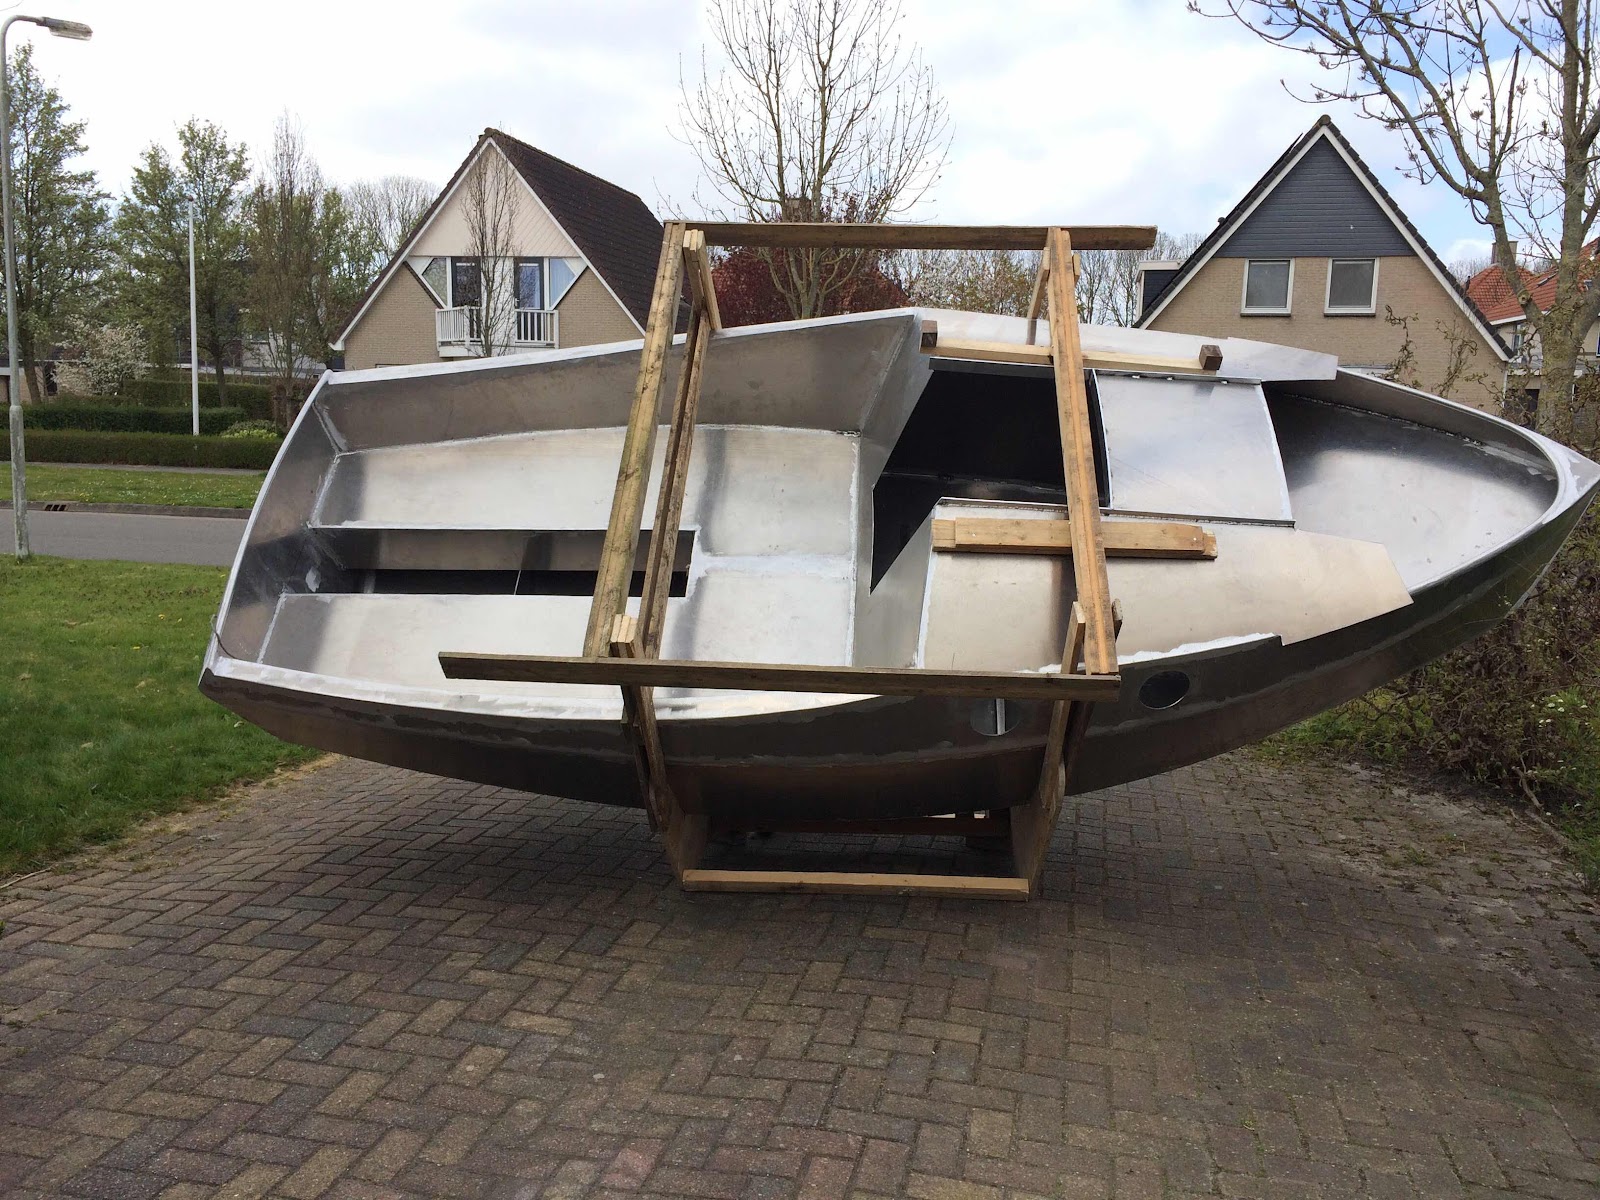
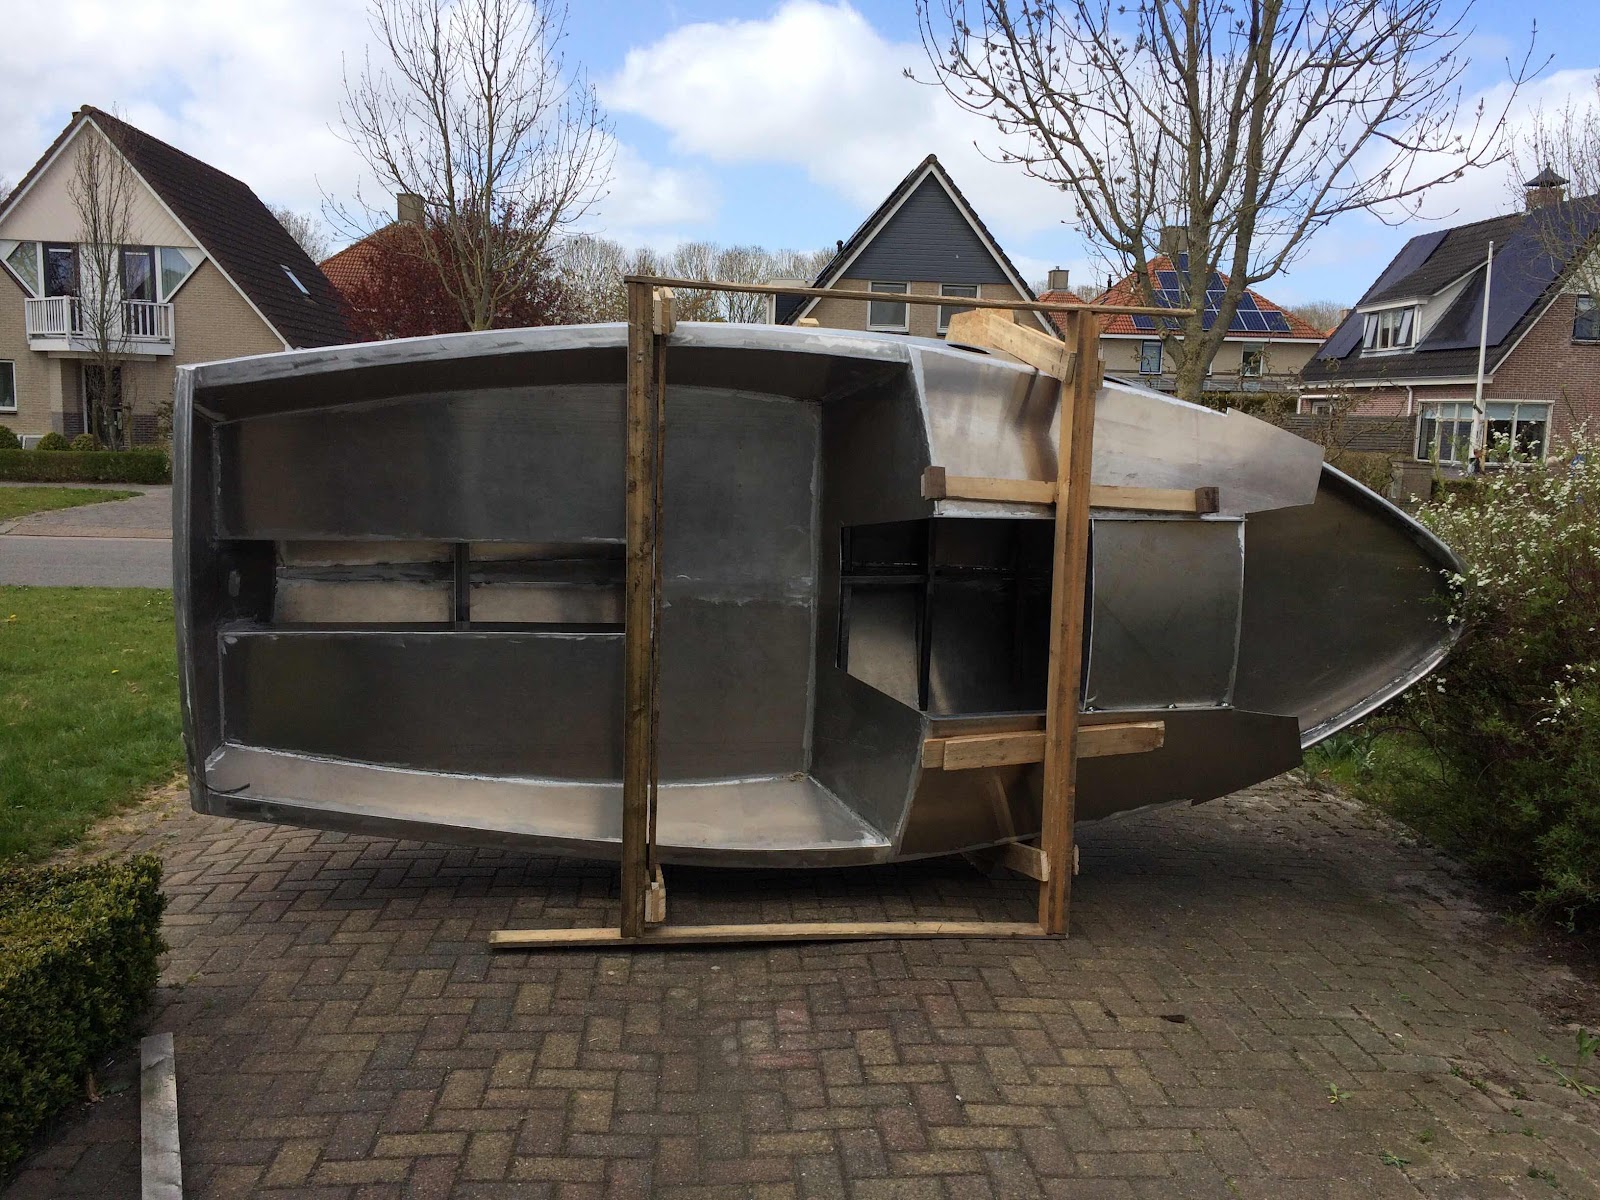
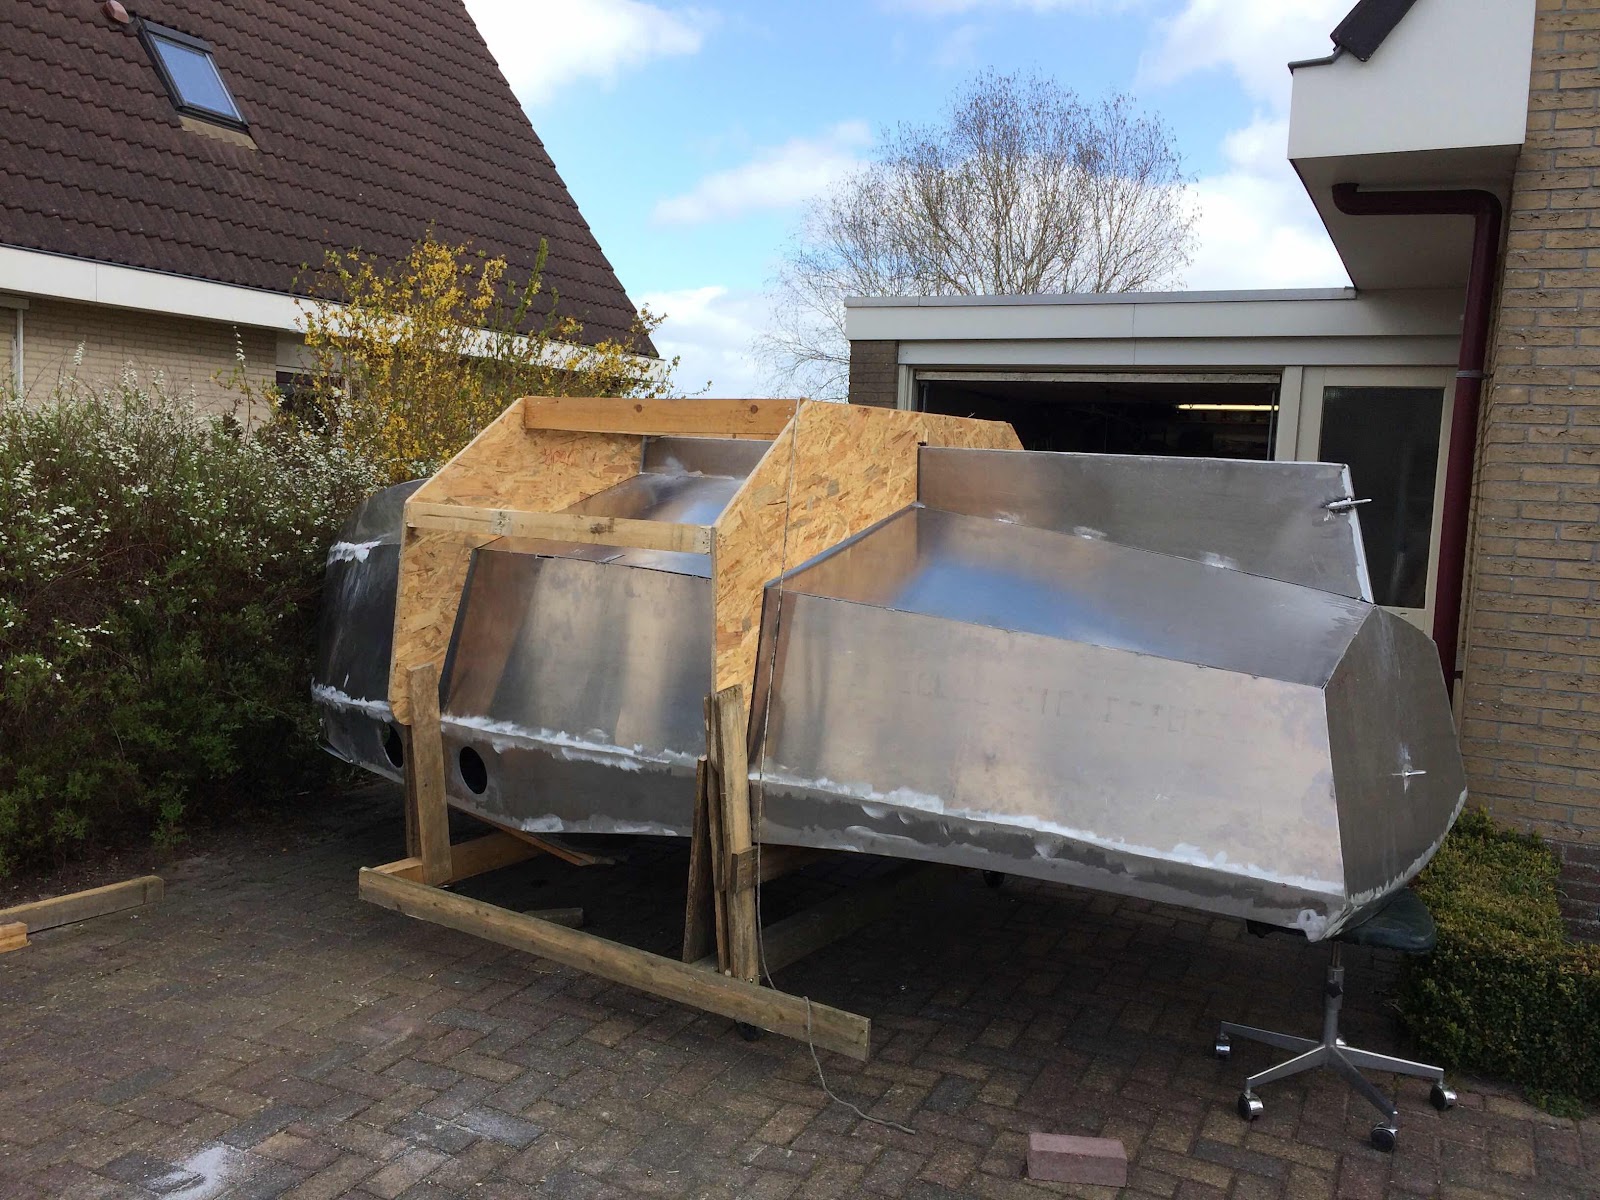
After finishing the bottom hull I had to plan uprighting it again and so buying a trailer.
As you can expect my minimalist attitude (building a small boat) you also can imagine my fear of spending much money. But a trailer doesn't come cheap. So it took a while to overcome my "fears" telling myself that a berth in a marina costs about the same whithin 2 years... 🙇

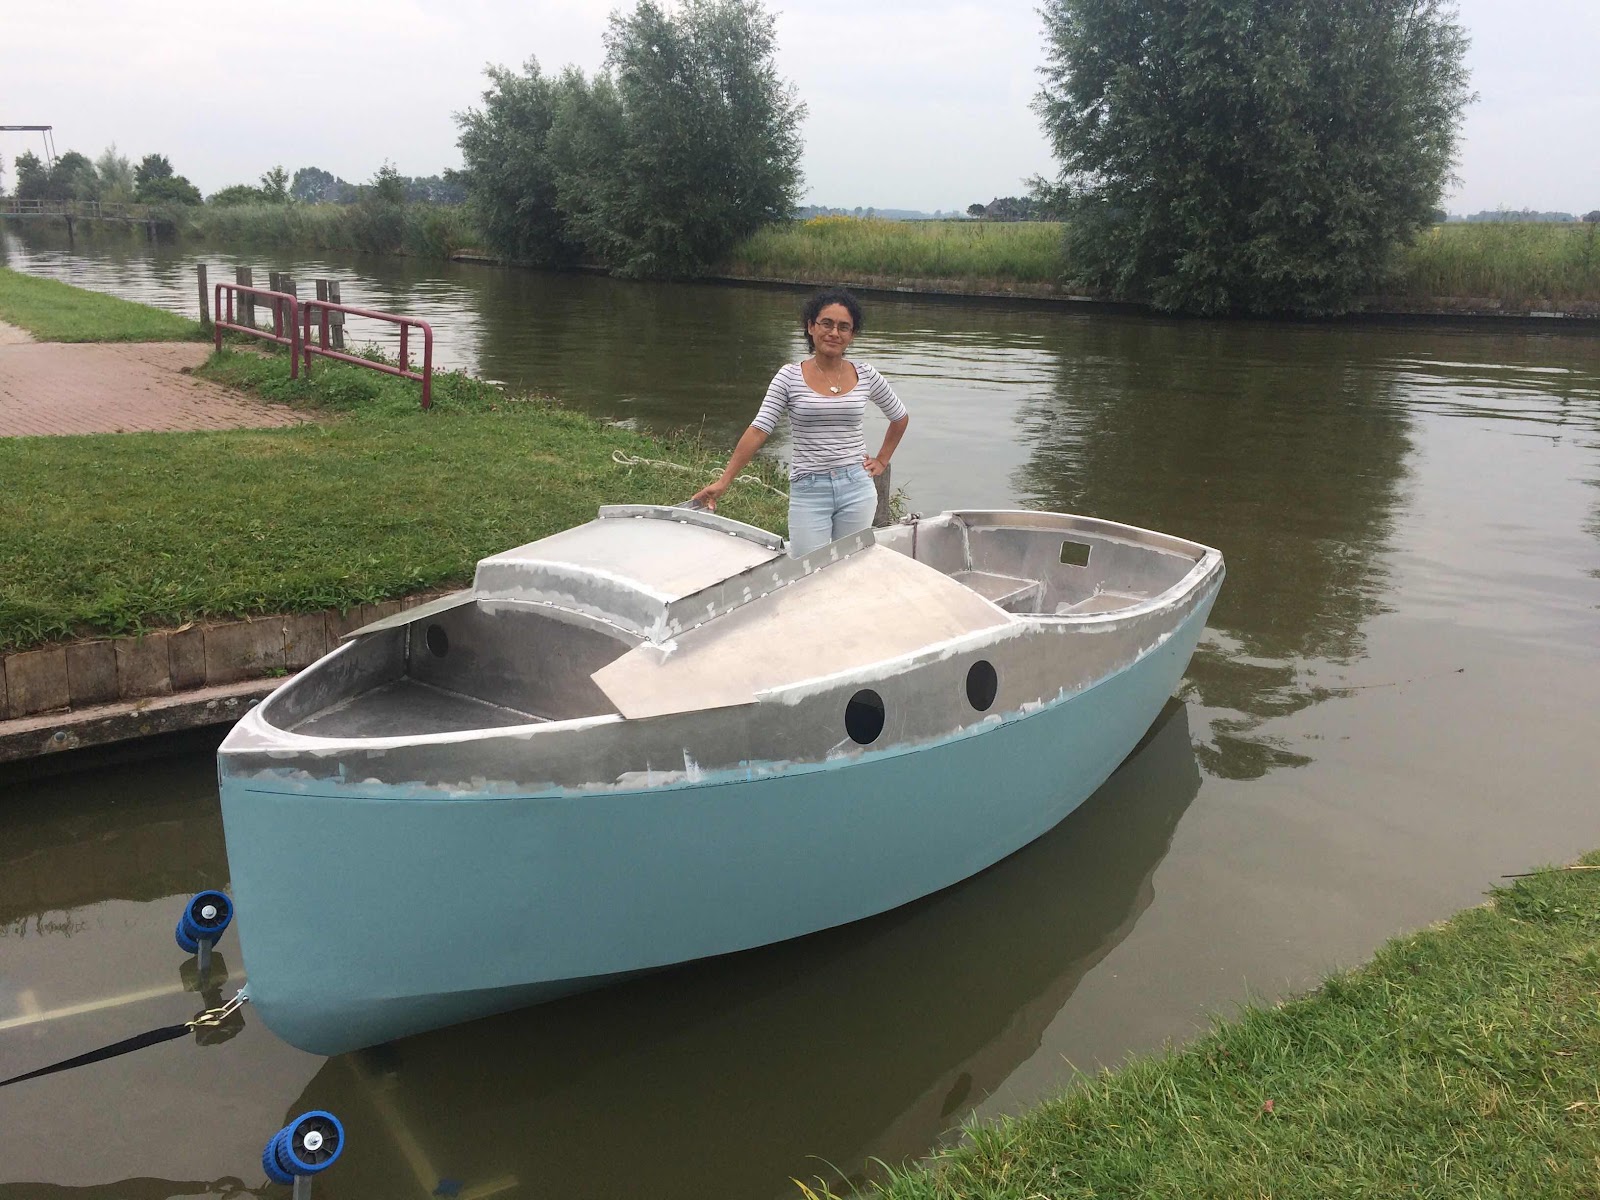
And yes, it is on its trailer and yes, it went easier than expected. Roling back with a few neighbours (with relieved covid rules) putting it on the trailer and adust the trailer was done within an hour. Of course leaving several extra hours to consume the rewards in the form of a home brew beer!

Here it is...


And now for the centerboard. Actually I made that before turning the boat upright again ofcourse.
The centerboard was a kind of a "mind-struggle" as well. It needed some weight in order to drop and it needed some structural width in order to be strong enough to withstand perpendicular forces.

I considered 1 cm thick aluminium. That is material I can't machine or proces. I also considered a steel centerboard. Could be made out of thinner sheet, heavy enough to drop but maybe still quite bendable. And what about galvanic effects?. Untill a certain moment I saw a picture of a commercial aluminum boat builder that made a (profiled) holow centerboard. Life can be so simple (without knowing it...).
I allready made a profiled hollow rudder so why not a centerboard.

One of the things I learned from the rudder is that I can use pipe material for the edges but it is risky grinding it through quite easily. So I used rod instead.

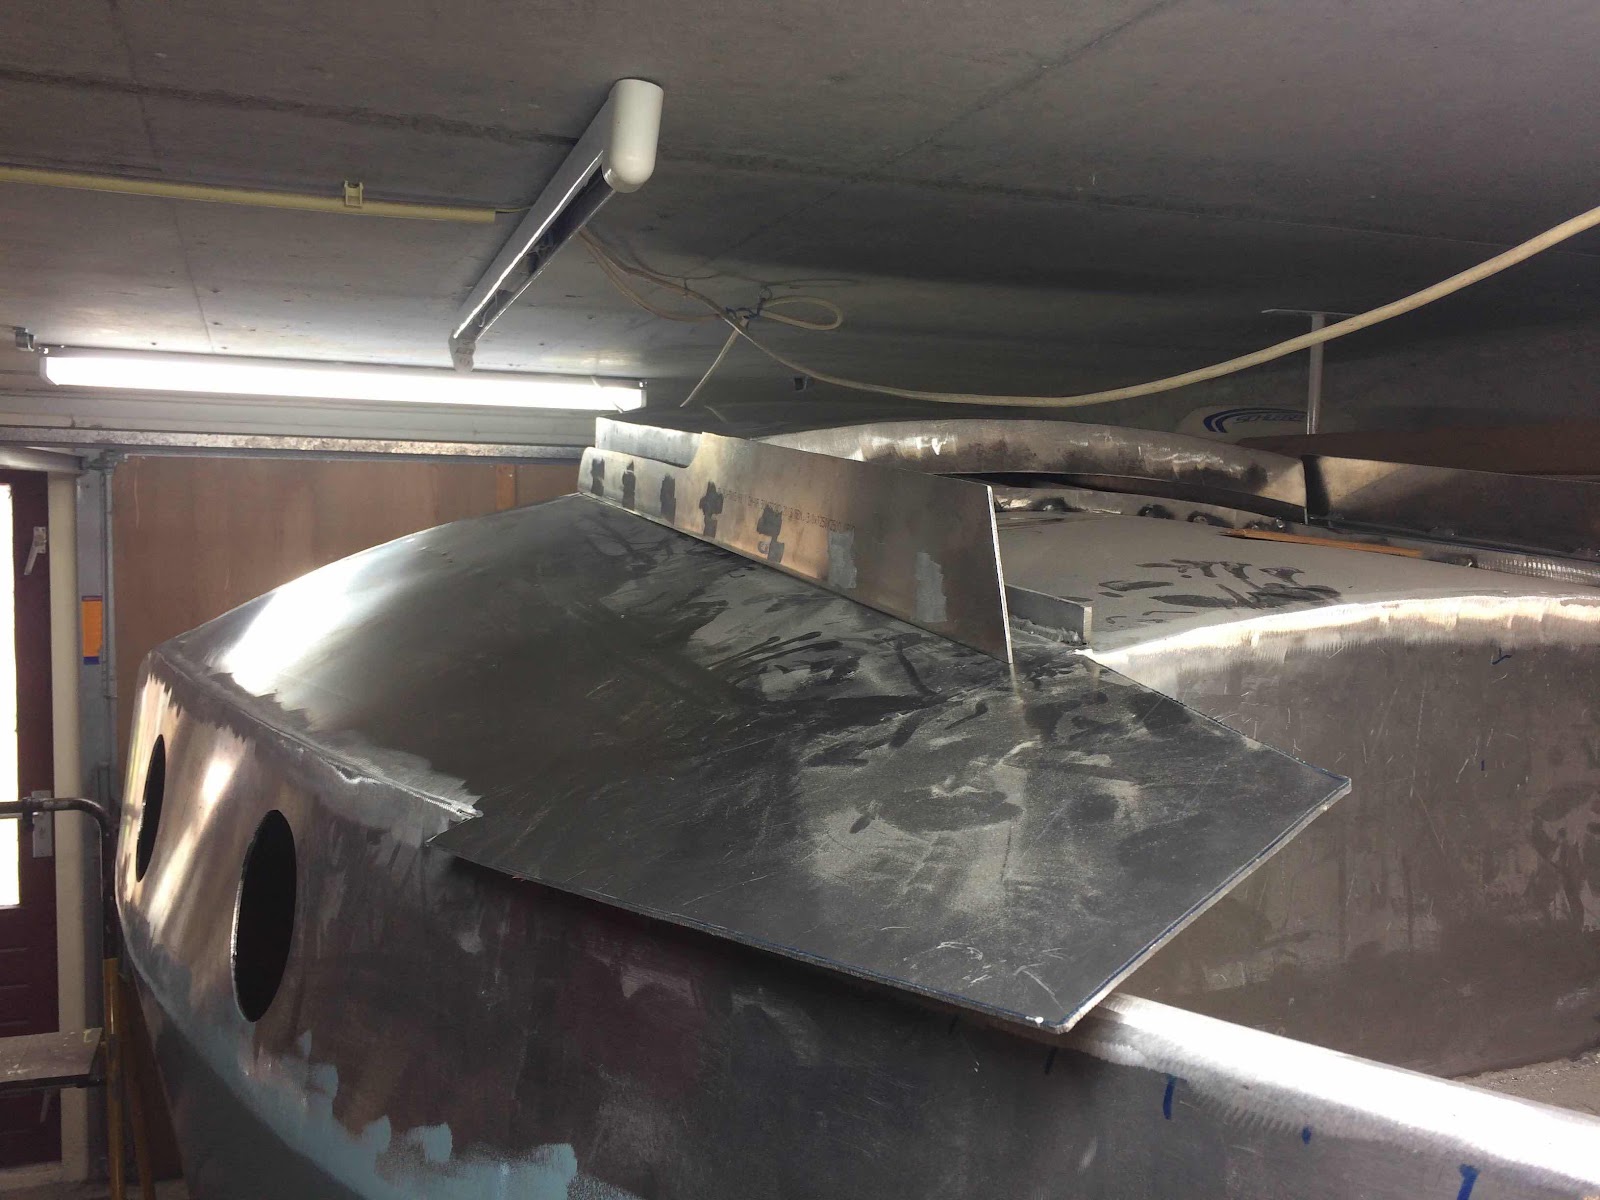
Bending rod is easier as well. And the centerboard took shape. I added structure stiffners perpendicular to the edges of the centerboard trunk and added about 7 kilo's of balast lead as well. Here are the pictures:

Welding the inside frome the outside

Lead ballast


Fitting the centerboard...


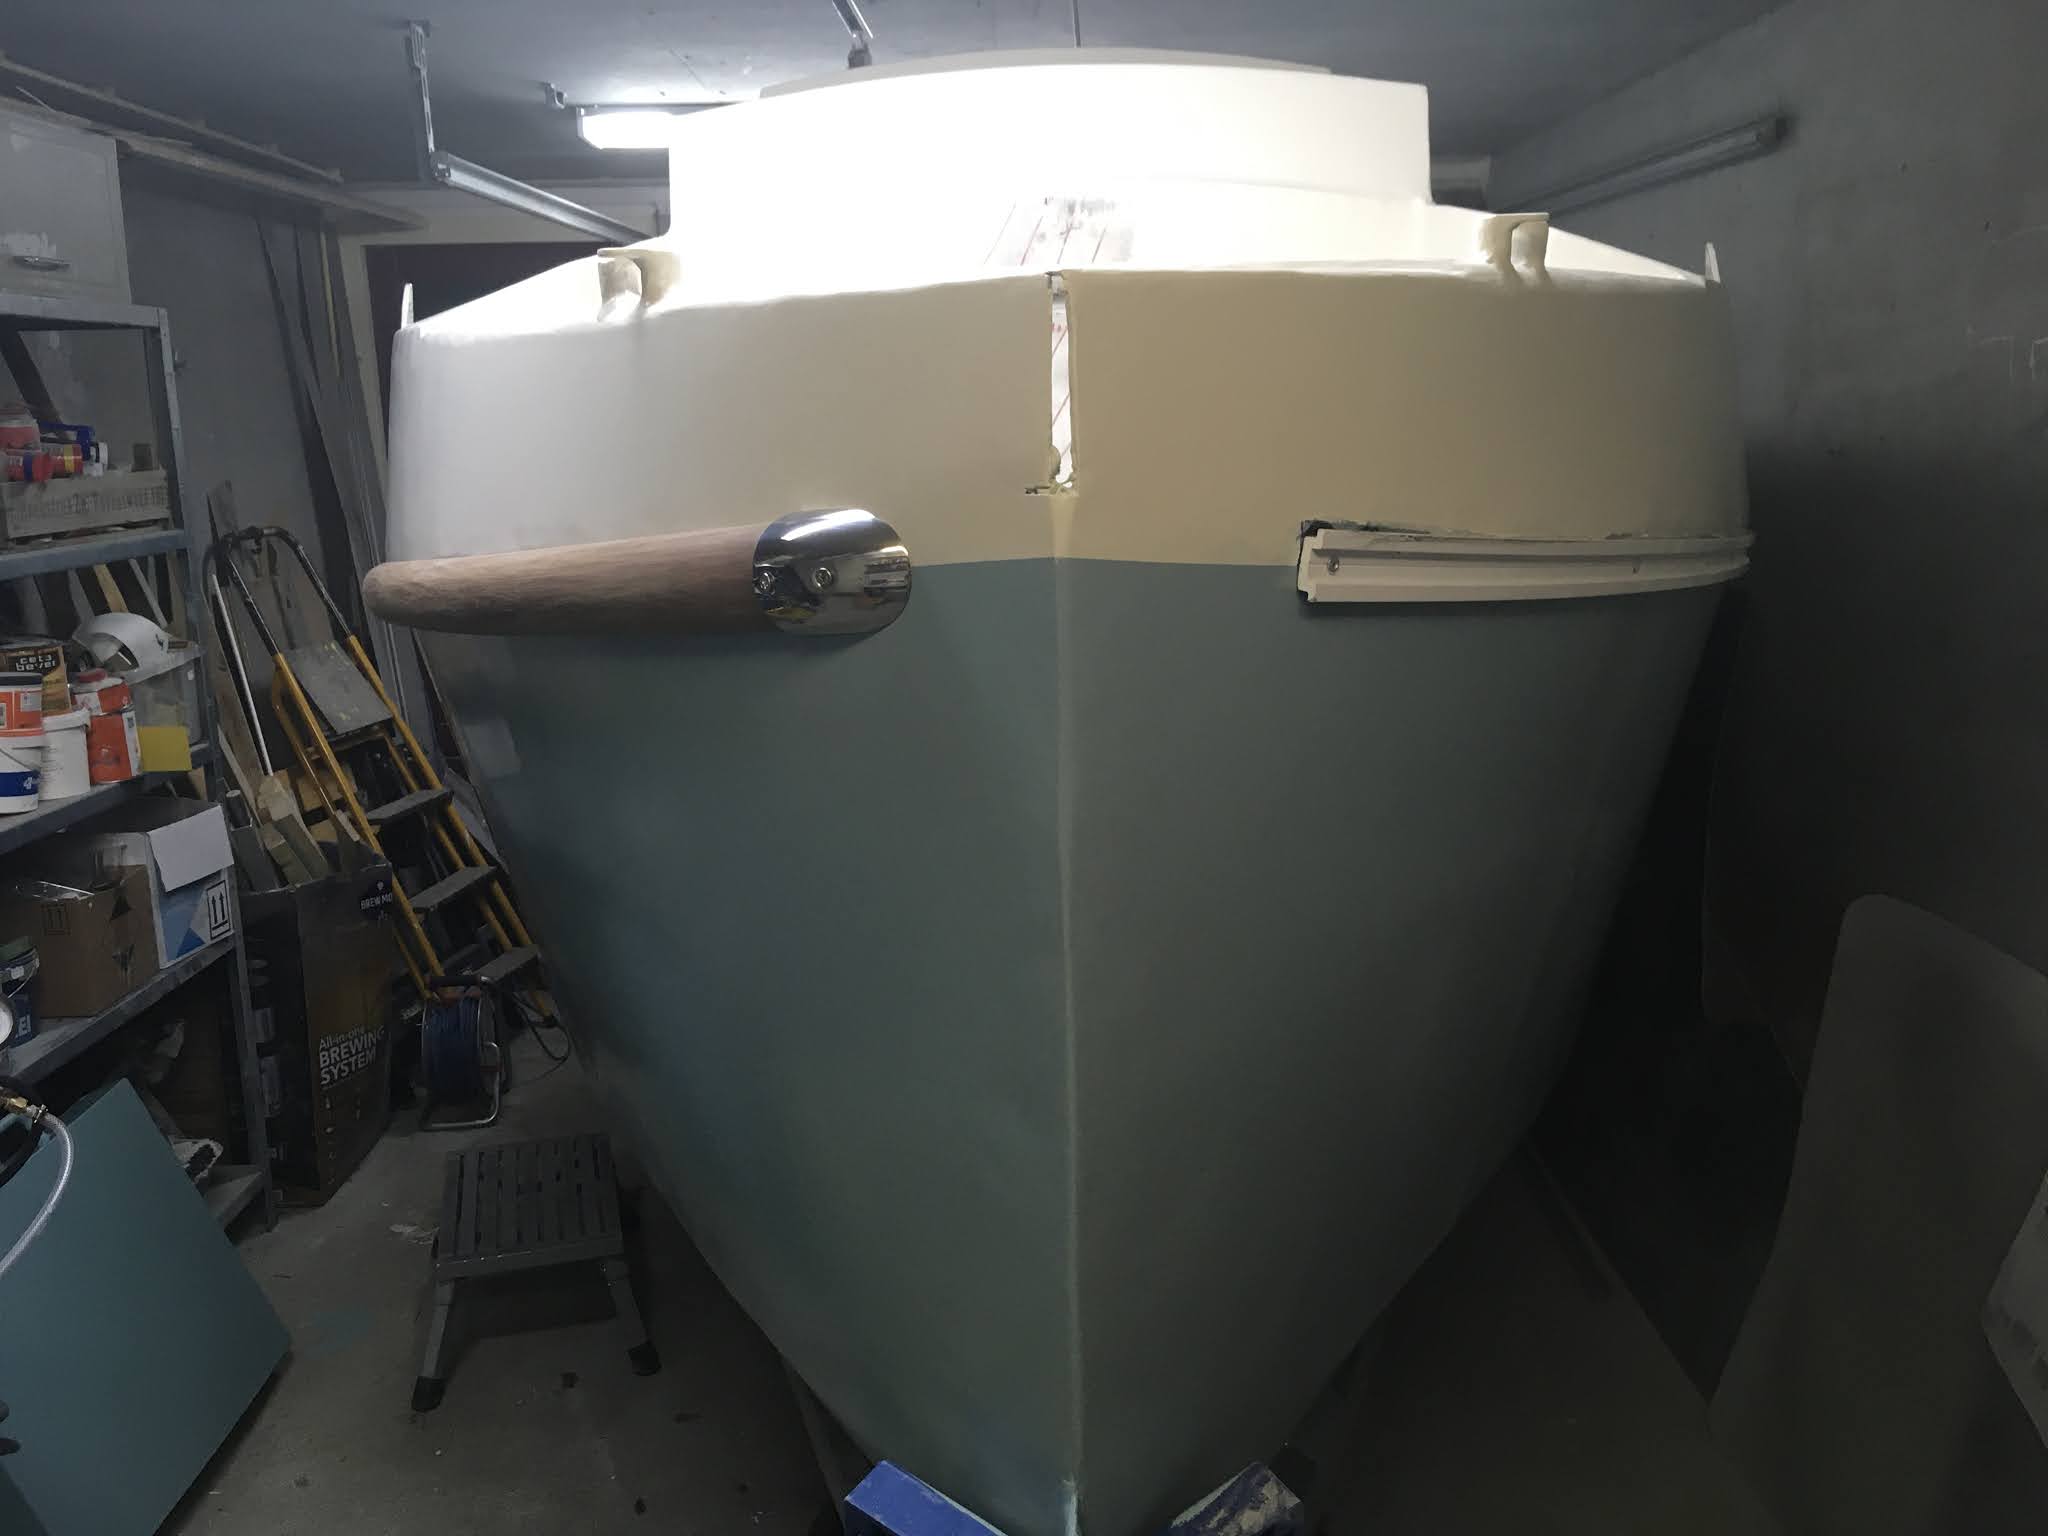
So far so good.
As the "floating test" approaches I had tho think about thethering and so. Hmmm cleats.. That seemed a typical end stage job but why not thinking over now. That turned out to be seemingly simple but not so in reality (in my brains). I could choose between: too expensive, to small, to large or not aluminum resulting in having to drill holes in my boat. I am aware that I can't avoid drilling holes in my boat but I can try to reduce it to a minimum. Result: cleats can be made from aluminum. And yeaee... they become painted in the same color as the boat.


Bottom work en upright again!

Well, where tot start...

The main purpose of turning over the boat was to be able to weld the bottom.
That succeeded so quickly that I didn't take any picture of it. I have a small Youtube of the final touches however: 

Now at the same time I devoloped the idea to coat the bottom as well. When turing the boat boack again I would like to put it on its trailer right away. With a finished bottom I didn't have to move it anymore to coat the hidden spots. 
The Keel I had to keep unpainted however. I still have to pour the ballast and I guess that the hot molten lead would damage the paint on the outside.

In the following pictures I'll give you an impression of the "priming-filling/leveling-coating" of the hull:


As you see I had to "correct" some small deformings. After all they were the first stages I build and I was indeed confronted with my lack of experience back then 😔. 

Still confused wether to label it as "imperfect" or as "not-bad-for-an-amateur".


Monday 27 April 2020

Rolling over with just 3 men in 1 hour

Time came to turn this vessel up side down as well. Not for covering or painting but to weld the long outside joints of the hull.
Now what to do in a pandemic limited situation? Try to do it all by my self? That would be possible if I had the right machines. 
But with some family and a bit of “engineering” it could do the job within an hour.

I extended the existing cradle over the top side of the boat in such a way that it formed a kind of crate which could be rolled over in a few steps.
Halfway the process I took the wheels from the bottom side and screwed them on the topside. The boat rolled in to the garage as easy as it came out... upside down...


As you can see at the picture above I didn’t finish the dorade boxes yet. This is because I had to leave out the floor boards until after the welding of the hull. Hot spatters could burn and ruin the floor. I can just pass these boards through the vent holes in the forward cabin wall.