Showing posts with label home built. Show all posts

Sunday, 30 July 2023

New Rig

2 Months since I posted the last modifications, I guess I am improving 🤓.
I mentioned that I would try to use my mainsail and rig that as a lugsail. And it worked! Although with some comments of my sailmaker as a lugsail needs a reinforced luff. I temporarily solved this with a Dyneema line connecting the forward ends of the yard and the boom alongside the luff limiting the tension. 

Now the sail was raised as a lug in about half a day and it looked very pretty already. 


But it took several weeks tinkering, testing and experimenting to make it a real functional lug rig. I experimented with the attachement of the halyard, the main sheet, the downhaul and a variety of other small features to keep the rig in place. And of course It had to meet a number of “Arjen”-requirements:
  • Construction as simple as possible
  • Easy to setup
  • Trimmable
  • Able to lower the mast easy and quickly without detaching downhaul, sail and halyard
  • Able to easily remove sail, yard and boom in one package for dry storing
Short test
I took Narhval for a sort test on a nice 3 BFT day on the local canal (Van Harinxmakanaal) and I found it sailing surprisingly well! Easy, relaxed and comfortable without any noticeable compromise to the sailing characteristics. It even tacked easier and it seemed to be a bit more controllable as well. Of course this due to the shifted CE which worked as I hoped for. 

Mizzen
Although the boat sailed better balanced it stil seemed to be a bit leeward and that was what I hoped for too. I got courages and decided to implement a mizzen as well. I considered a few options for this sail and came up with a triangular spritsail. This sail is very easy and fast to fold down to the mast, it doesn’t require a long stern sprit and it lacks yard and boom. It also is trimmable with the tension of the sprit. I made it so that I only have to detach the sprit tensioner to be able to pull out the mast-sail-sprit-pack in an instant. 

Probably I have to trim the mainsail a bit forward now but as the weather here in the Netherlands has been “reset” to 5-6BFT and rainy I wasn’t able to test it in the current configuration yet.


One of the things I learned up till now is that the calculation of CLR and CE isn’t as easy and straightforward as it seems. Especially the CLR needs some reconsideration. I found lots of information on the internet usually calculating the lateral surface under water as a whole finding the CLR.
As the shape of the bow influences the frontal resistance the shape of the lateral resistance must have a similar effect too. More about that in a next post.
 

Sunday, 14 May 2023

Minor and major changes (less is more)

In a previous post I already told that “tinkering” is at least as important as sailing. Probably the sailing is instrumental to the tinkering. How else would I know what to tinker 😇.

First of all I would like to get rid of the boom gallows. It is a lot of structure used in a small spot of the boat. In the Netherlands a kind of removable support (called mik or schaar) is more common and in a aluminum boat that is easy to make. In addition I had to install an extra line to keep the boom up during rigging (couldn’t find the right English word).


So, nice light weather, time for a test and I wished that I didn’t invite Elsa because it didn’t go very well. The main sheet got tangled in the aft clamps and the jib sheet ditto around the air scoops. Now the the tangling jib sheets bothered me every trip so that had to be “cured”. The main sheet problem was solved quite easy. And again aluminum is a bless: an angle grinder and a welding machine dit the job in no time.


Cut from the rim of the cockpit and placed in inside! A even more “clean” lay out. I guess my boat becomes a real prototype?

Now another issue was the foot rail on the roof of the cabin. That was a bit to low to be really functional. At the broadest beam it would have been nice to be able to tie a fender to it as well. So that was my next project. 


Oh I forgot to mention that up until now I was able to re-use parts and use scrap aluminum to make these changes.
I also realise that with all these (and previous) changes I definitely need a major paint job. But as aluminum is “gentile” on corrosion that can wait till next winter.

Now for the major changes…
That jib… During my sailing training weeks (in the pre-history) I always hated the jib the most. Rigging it on a small fore deck on restless Frisian lakes always flapping aggressively and now tangling its sheets around my air scoops. Would be nice to get rid of that sail as well. And so I began to study an old love again: the lug rig! Could it be possible to make a lug rig on my Pocketship?

Of course it is possible. Even on the CLC website there is information to be found for a lug rig on the Pocketship. But how to make that from the existing rig? With a bit of (real scissor) cut and paste I got the idea to make it simply of my mail sail including boom and gaff. I also saw that it would be possible to trim it forward and aft depending on the attachment points of the halyard and the downhaul. 


Probably it will enable implementation a mizzen as well. First of all I want to have it trimmed as a single sail. Later on I can shift this sail more forward to have it balanced with a mizzen. 

And of course there needs to be some Arjen-invention-input as well. So I figured out how to make this setup so that I can rig it easily and can lower the mast instantly (for the many bridges in Friesland) But I will post later on that topic.

Friday, 3 February 2023

More of a builder than a sailor

Maybe I promised to have some more footage of being on the water with the Narhwal. I have to read the earlier posts to confirm that 😉.

In the mean time I can bring up lots of excuses why I havent been on the water more often. I guess cold feet is one of them, however I also discovered that I am more of a builder than a sailor. 


In the past few months I considered all kinds of building plans: From building a new boat from scratch to restoring an old ship and, to modify my Pocketship.


Findings that need modification 😇

Although I wasn't as much as possible on the water I sailed enough to get to know my ship better.

I discovered (as most Pocketship owners did) that the boat can be a bit leeward. The common applied solution is to trim the mast a bit back wich in my opinion doesn't effect much. 

Secondly, and that is a common Pocketship characteristic as well, is that the Pocketship has a relative slow turn rate for such a small vessel. In close hauled courses after tacking it is recomended not to tension the jib to fast as the boat slows down considerable and the rudder effectivity is decreasing. Adding up to the leeward tendency it is a bit tricky to keep the boat close hauled after tacking. I found out that in Strong winds (6 Bft) the effect is even worse loosing control completely bearing away up until a broad reach.

Now for the slow turn rate I guess the model of the rudder is one of the culprits. Of course it fits esthetically the nice classic lines and it ommits the necessity of a complex tilting mechanism.

Another reasson for the slow turning probably is the long keel streching over almost the entire lenght of the hull. Now the keel was an eyesore allready for a longer time and for several reassons: First off all it causes some trailer issues. As most standard trailers can accept V-shaped hulls, when it comes to even a shallow keel, the trailers have to be modified. I did a lot of tinkering to my trailer and even modified the front of the keel to be able to get the boat on the trailer smooth and easy.


Furthermore the keel also makes the boat sit quite high on the trailer but the most important issue is that you can't keep the Pocketship level easily if you beach the boat or fall dry on the Wadden.


The Pocketship showing this on the right is built by Bruno Lequeu of Dijon, France.

Now as expected my aluminum Pocketship is some heavier than the original wood-epoxy version. Therefore it sits about 1/2 to 1 inch deeper in the water which is negligible in the water. On the trailer however it can make a difference. But getting out the leas ballast can be quite an operation. So all in all I need to get rid of that keel someday 😑.


First major modification (plan)

The theory of reducing leeuwardness is simple: Either move the center of effortness (CE) backwards or the center of lateral resistance (CLR) forward (or both ofcourse). Moving the CE backwards means that the center of the complete sail-area backwards. When a boat is trimmed well, this can be done by minor shifts of the mast. My approach is a bit differtent: I want to shorten my mainsail by cutting a part of the leech and shorten the boom. Than add a small (unstayed) mizzen (see picture below).
Execpt from moving the CE backwards this way I also attain some more directional control.

Although not stricly necessary I also want to remove the boomgallows. It doesn't serve a purpose for catching the boom anymore and only for lowering the mast for trailering I make a removeable support, either apart or in combination with a divisible mizzen-mast.

Also the layout of the main sheet will change. The standard layout tends to "entanglement" either with other lines or with myself. So I want to implement one attachpoint on the boom probably with some tension divider.


After this modification I want to sail it a bit more frequent. The second major modification (plan) I will implement in 2024 so that I can tweak the plan with the latest experience. This will consist of trimming the keel, change the centerboard (longer and narrower) and change the rudder.


Wednesday, 26 January 2022

Companion way (continued) and solar power

 As I mentioned in a earlier post I had to consider additional measures to prevent water draining into the cabin. I had a piece of pvc (?)  from an anti wearing mat for furniture. That neither welds nor glues very easy so after some fitting and testing I riveted to the hatch. The hatch now is complete rain resistant.


Solar Power

For the solar power it took a while before I found a flexible panel with the right size. Of course there are lots of small panels available but to have a reasonable output it became a quest for the biggest panel that fits on the companion way garage. And dat was not a standard size. Besides that lots of small panels were equiped with "so handy" usb connectors wich I - obviously - did not like very much because of the poor water resistancy.

The Charger/regulator was another aspect. I found a (very popular) model on the internet which could do the job considering the specs. Thes model apeared to be faulty and I had to replace it. My habit is always not to replace it with the same brand and model as it allready "proved" not to be completely reliable.

Below the faulty one where you can see the problem: output on the regulator 12.8 V and on the panel just a mere 7.8V ???


It now works very fine and charges a AGM battery of around 50AH. I mainly use this for the cabin lights, to charge my cell phone and tablet and for navigation lights.

As you can see in the pictures below the LED navigation lights creates i nice "christmas treee" 😀


The top light was a bit more work and creativity. I decided not to insert a cable into the mast during the build of the mast. I thought that would be possible afterwards as well. (which proved correct)


Yes the bulb is a LED too...

In the picture above you also see that I made some changes in the rigging as well. I plan to paint the top of the mast white in the winter.


Thursday, 9 July 2020

Trailer and centerboard

Two posts at the same date? Wow. No I am not the writer I expected to be so publishing posts is a bit infrequent sorry (but hey time doesn't exist...).

After finishing the bottom hull I had to plan uprighting it again and so buying a trailer.
As you can expect my minimalist attitude (building a small boat) you also can imagine my fear of spending much money. But a trailer doesn't come cheap. So it took a while to overcome my "fears" telling myself that a berth in a marina costs about the same whithin 2 years... 🙇

And yes, it is on its trailer and yes, it went easier than expected. Roling back with a few neighbours (with relieved covid rules) putting it on the trailer and adust the trailer was done within an hour. Of course leaving several extra hours to consume the rewards in the form of a home brew beer!

Here it is...


And now for the centerboard. Actually I made that before turning the boat upright again ofcourse.
The centerboard was a kind of a "mind-struggle" as well. It needed some weight in order to drop and it needed some structural width in order to be strong enough to withstand perpendicular forces.

I considered 1 cm thick aluminium. That is material I can't machine or proces. I also considered a steel centerboard. Could be made out of thinner sheet, heavy enough to drop but maybe still quite bendable. And what about galvanic effects?. Untill a certain moment I saw a picture of a commercial aluminum boat builder that made a (profiled) holow centerboard. Life can be so simple (without knowing it...).
I allready made a profiled hollow rudder so why not a centerboard.

One of the things I learned from the rudder is that I can use pipe material for the edges but it is risky grinding it through quite easily. So I used rod instead.

Bending rod is easier as well. And the centerboard took shape. I added structure stiffners perpendicular to the edges of the centerboard trunk and added about 7 kilo's of balast lead as well. Here are the pictures:

Welding the inside frome the outside

Lead ballast


Fitting the centerboard...


So far so good.
As the "floating test" approaches I had tho think about thethering and so. Hmmm cleats.. That seemed a typical end stage job but why not thinking over now. That turned out to be seemingly simple but not so in reality (in my brains). I could choose between: too expensive, to small, to large or not aluminum resulting in having to drill holes in my boat. I am aware that I can't avoid drilling holes in my boat but I can try to reduce it to a minimum. Result: cleats can be made from aluminum. And yeaee... they become painted in the same color as the boat.


Bottom work en upright again!

Well, where tot start...

The main purpose of turning over the boat was to be able to weld the bottom.
That succeeded so quickly that I didn't take any picture of it. I have a small Youtube of the final touches however: 

Now at the same time I devoloped the idea to coat the bottom as well. When turing the boat boack again I would like to put it on its trailer right away. With a finished bottom I didn't have to move it anymore to coat the hidden spots. 
The Keel I had to keep unpainted however. I still have to pour the ballast and I guess that the hot molten lead would damage the paint on the outside.

In the following pictures I'll give you an impression of the "priming-filling/leveling-coating" of the hull:


As you see I had to "correct" some small deformings. After all they were the first stages I build and I was indeed confronted with my lack of experience back then 😔. 

Still confused wether to label it as "imperfect" or as "not-bad-for-an-amateur".


Monday, 27 April 2020

Rolling over with just 3 men in 1 hour

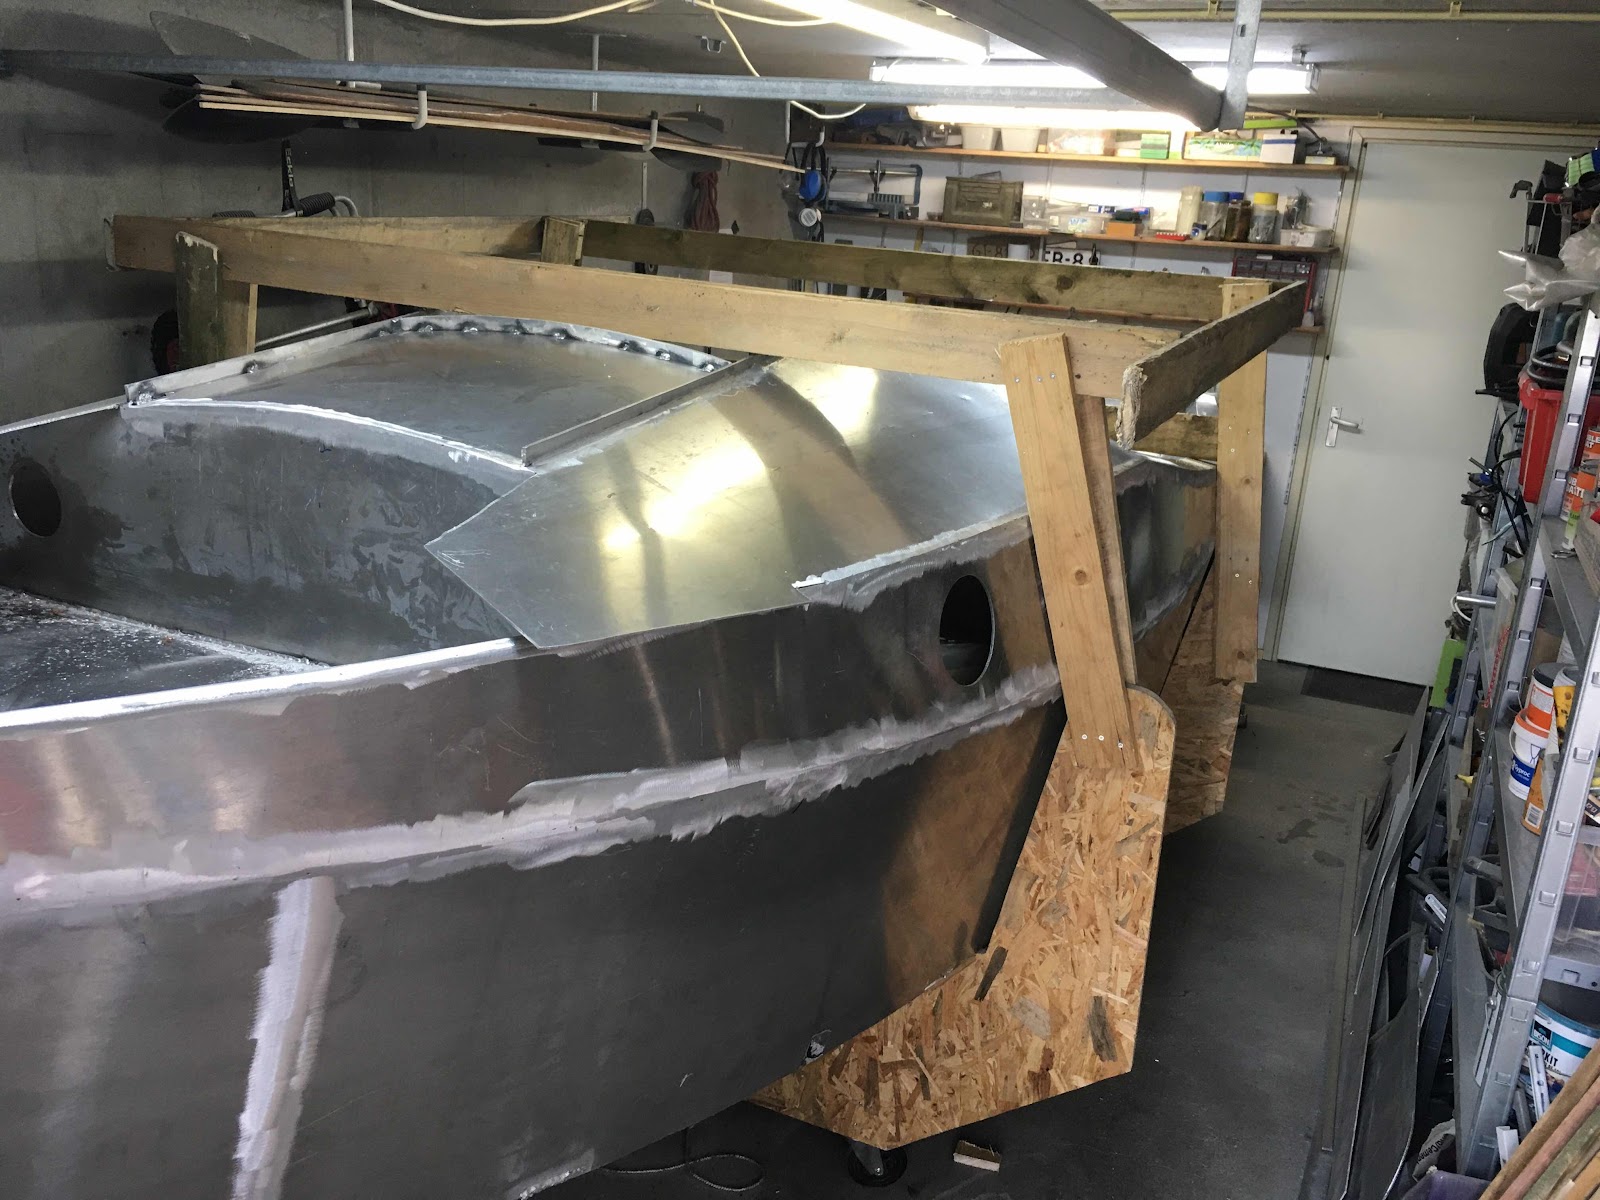
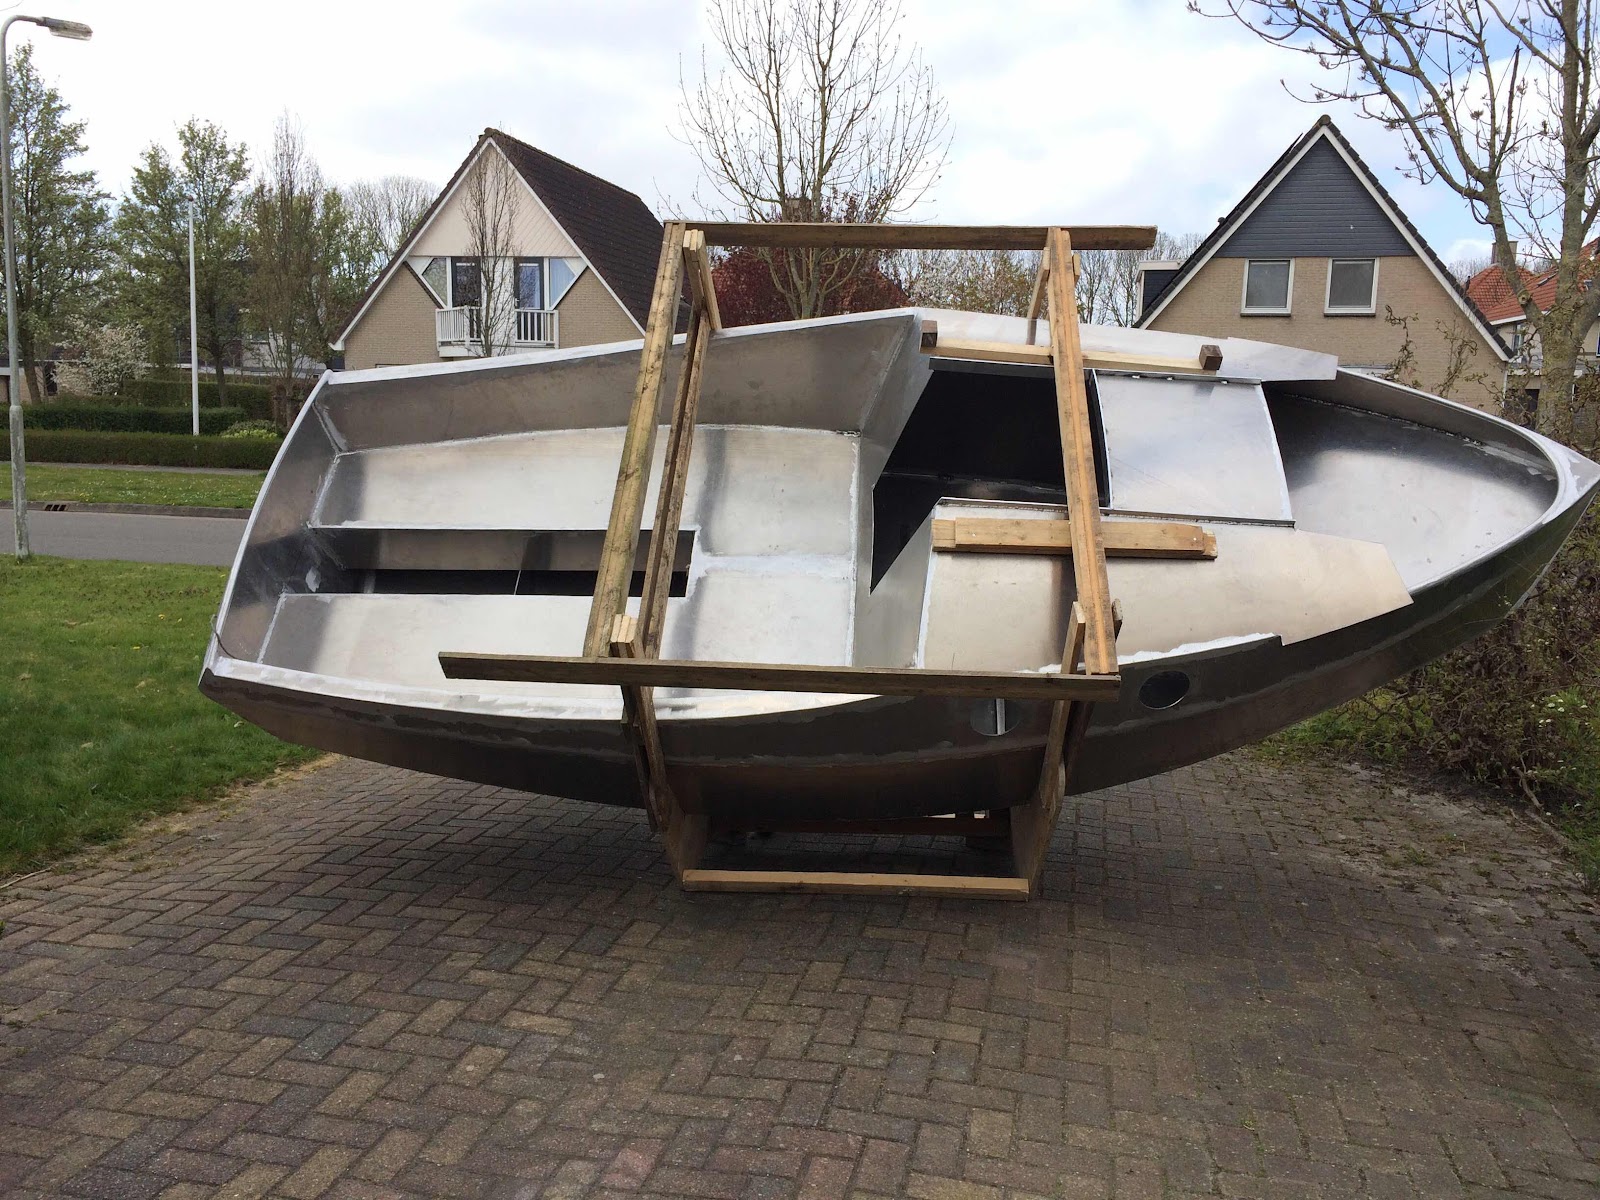
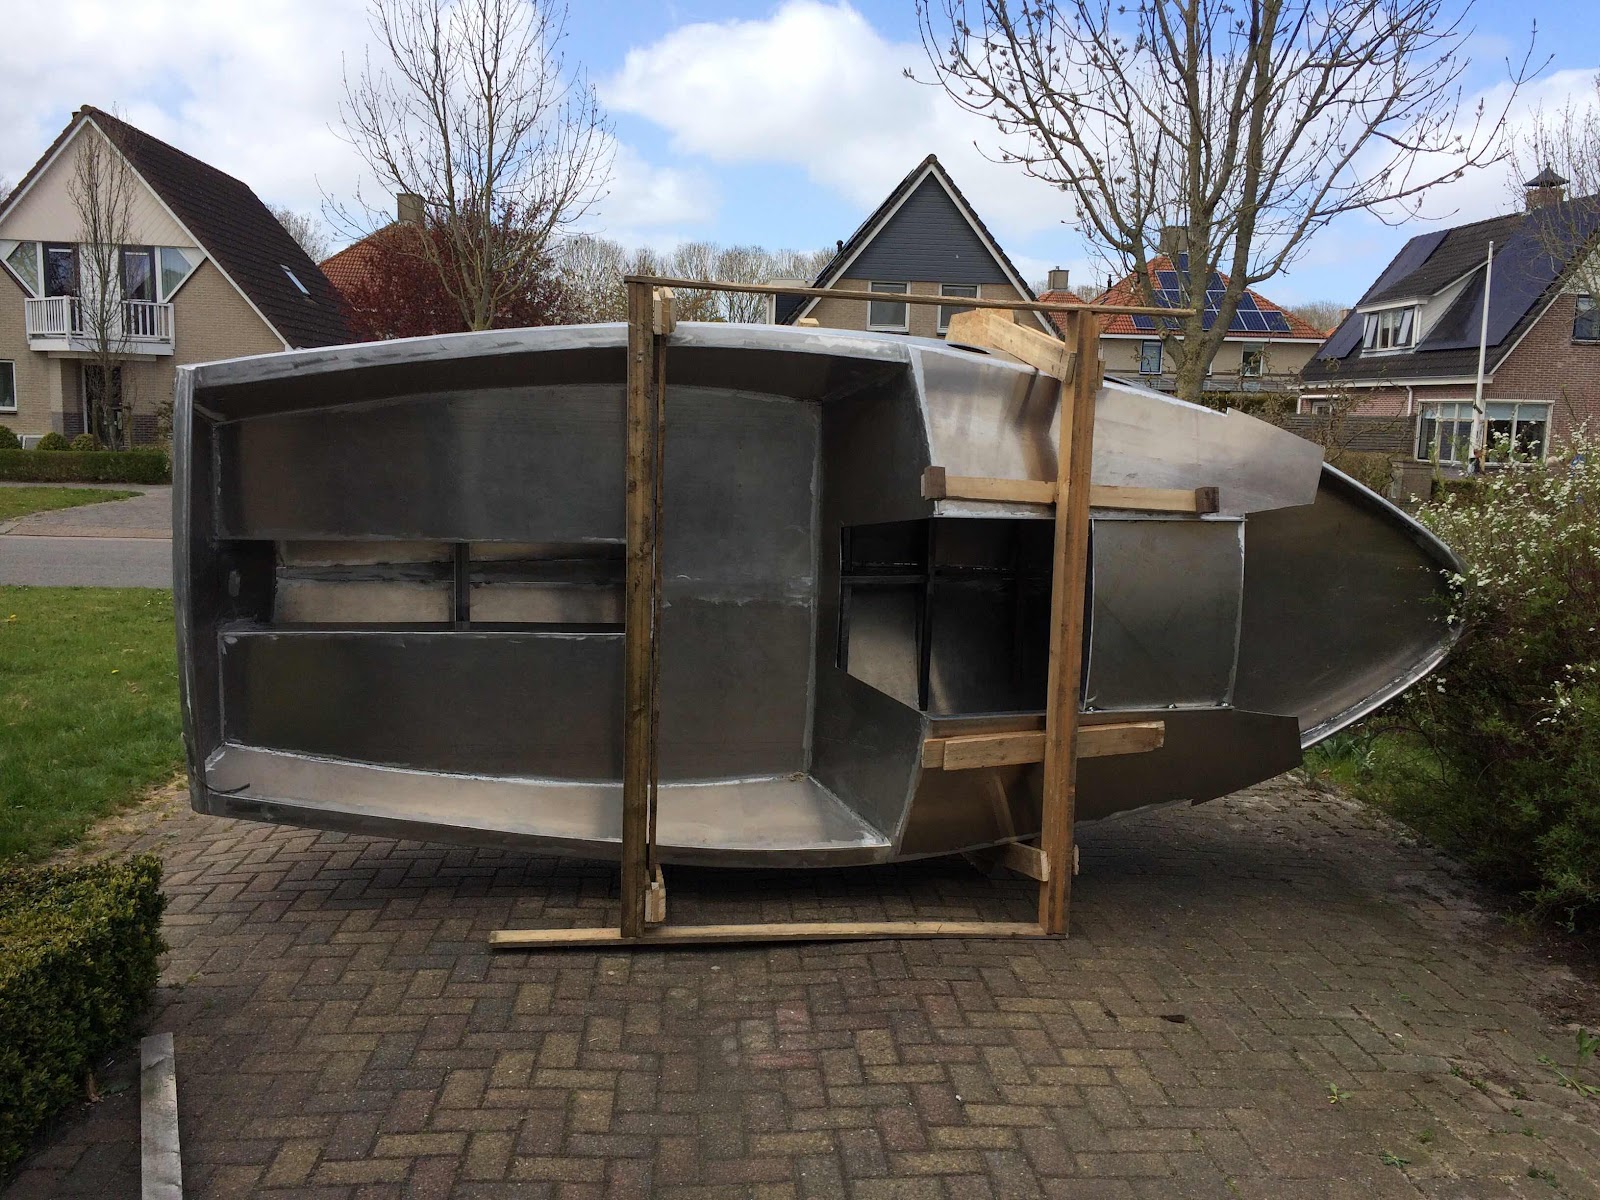
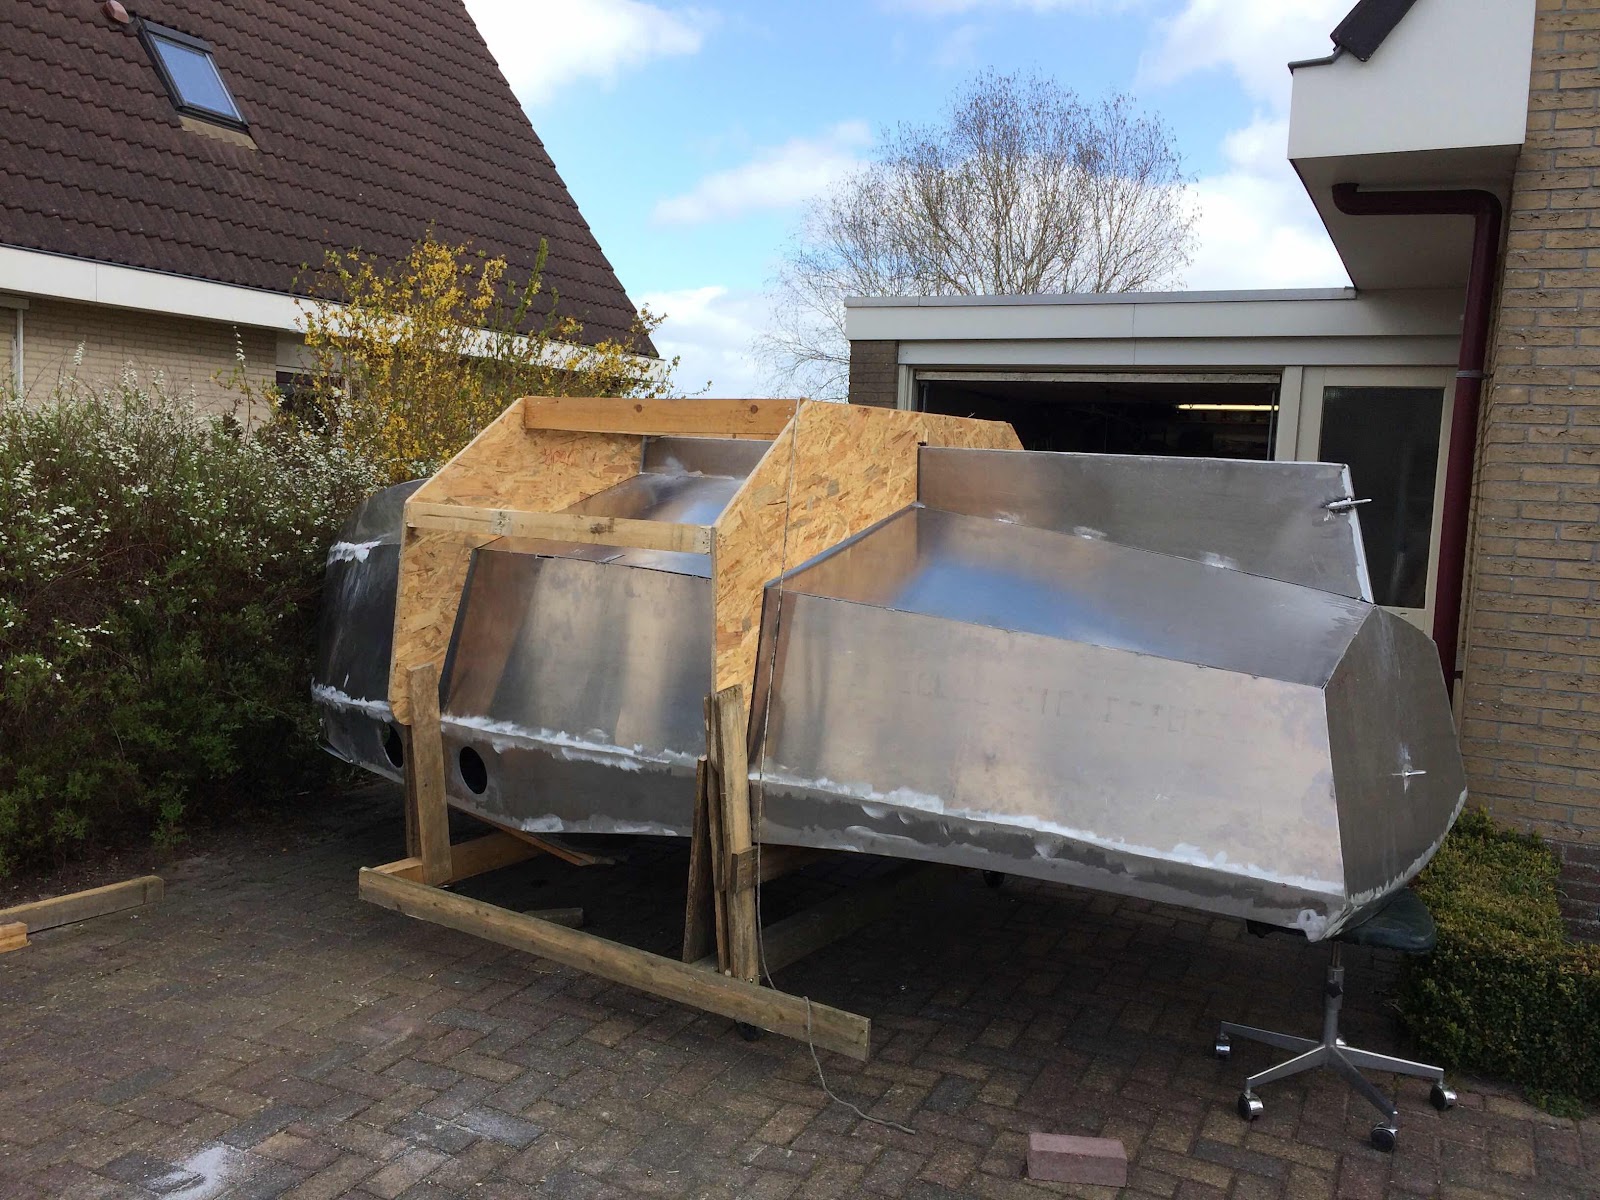
Time came to turn this vessel up side down as well. Not for covering or painting but to weld the long outside joints of the hull.
Now what to do in a pandemic limited situation? Try to do it all by my self? That would be possible if I had the right machines. 
But with some family and a bit of “engineering” it could do the job within an hour.

I extended the existing cradle over the top side of the boat in such a way that it formed a kind of crate which could be rolled over in a few steps.
Halfway the process I took the wheels from the bottom side and screwed them on the topside. The boat rolled in to the garage as easy as it came out... upside down...


As you can see at the picture above I didn’t finish the dorade boxes yet. This is because I had to leave out the floor boards until after the welding of the hull. Hot spatters could burn and ruin the floor. I can just pass these boards through the vent holes in the forward cabin wall.